1. The Pencil Tool
The Pencil tool is the simplest
one we're going to create. It will place a small dot wherever you tap
the screen, or a continuous squiggly line if you continue to drag your
finger around.
Make a new NSObject subclass named PencilTool and give it the following content:
//  PencilTool.h
#import <Foundation/Foundation.h>
#import "Tool.h"
@interface PencilTool : NSObject <Tool> {
  id <ToolDelegate> delegate;
NSMutableArray *trackingTouches;
  NSMutableArray *startPoints;
  NSMutableArray *paths;
 }
+ (PencilTool *)sharedPencilTool;
@end

//  PencilTool.m
#import "PencilTool.h"
#import "PathDrawingInfo.h"
#import "SynthesizeSingleton.h"
@implementation PencilTool
@synthesize delegate;
SYNTHESIZE_SINGLETON_FOR_CLASS(PencilTool);
- init {
  if ((self = [super init])) {
    trackingTouches = [[NSMutableArray array] retain];
    startPoints = [[NSMutableArray array] retain];
    paths = [[NSMutableArray array] retain];
  }
  return self;
}
- (void)activate {
}
- (void)deactivate {
  [trackingTouches removeAllObjects];
  [startPoints removeAllObjects];
  [paths removeAllObjects];
}
- (void)touchesBegan:(NSSet *)touches withEvent:(UIEvent *)event {
  UIView *touchedView = [delegate viewForUseWithTool:self];
  for (UITouch *touch in [event allTouches]) {
    // remember the touch, and its original start point, for future
    [trackingTouches addObject:touch];
    CGPoint location = [touch locationInView:touchedView];
    [startPoints addObject:[NSValue valueWithCGPoint:location]];
    UIBezierPath *path = [UIBezierPath bezierPath];
    path.lineCapStyle = kCGLineCapRound;
    [path moveToPoint:location];
    [path setLineWidth:delegate.strokeWidth];
    [path addLineToPoint:location];
    [paths addObject:path];
  }
}
- (void)touchesCancelled:(NSSet *)touches withEvent:(UIEvent *)event {
  [self deactivate];
}
- (void)touchesEnded:(NSSet *)touches withEvent:(UIEvent *)event {
  for (UITouch *touch in [event allTouches]) {
    // make a line from the start point to the current point
    NSUInteger touchIndex = [trackingTouches indexOfObject:touch];
    // only if we actually remember the start of this touch...
    if (touchIndex != NSNotFound) {
      UIBezierPath *path = [paths objectAtIndex:touchIndex];
      PathDrawingInfo *info = [PathDrawingInfo pathDrawingInfoWithPath:path
        fillColor:[UIColor clearColor] strokeColor:delegate.strokeColor];
      [delegate addDrawable:info];
[trackingTouches removeObjectAtIndex:touchIndex];
      [startPoints removeObjectAtIndex:touchIndex];
      [paths removeObjectAtIndex:touchIndex];
    }
  }
}
- (void)touchesMoved:(NSSet *)touches withEvent:(UIEvent *)event {
  UIView *touchedView = [delegate viewForUseWithTool:self];
  for (UITouch *touch in [event allTouches]) {
    // make a line from the start point to the current point
    NSUInteger touchIndex = [trackingTouches indexOfObject:touch];
    // only if we actually remember the start of this touch...
    if (touchIndex != NSNotFound) {
      CGPoint location = [touch locationInView:touchedView];
      UIBezierPath *path = [paths objectAtIndex:touchIndex];
      [path addLineToPoint:location];
    }
  }
}
- (void)drawTemporary {
  for (UIBezierPath *path in paths) {
    [delegate.strokeColor setStroke];
    [path stroke];
  }
}
- (void)dealloc {
  [trackingTouches release];
  [startPoints release];
  [paths release];
  self.delegate = nil;
  [super dealloc];
}
@end
The interesting parts of this
code are all contained in the various "touches" methods, which look at
all the current touches (yes, this will work with multitouch just fine).
In each case, these methods create or modify a Bézier path, or prepare a
completed path, using the fill color from the delegate to create a new
instance of a DrawablePathDrawingInfo, and pass that to the controller as a complete drawing operation, ready to be added to the DudelView's stack of Drawable objects. object called
PathDrawingInfo is a simple class that conforms to the Drawable protocol we defined earlier. It encapsulates a UIBezierPath and two UIColor values for the stroke and fill. Add a new class called PathDrawingInfo to your project, and give it the following content:
// PathDrawingInfo.h
#import <Foundation/Foundation.h>
#import "Drawable.h"
@interface PathDrawingInfo : NSObject <Drawable> {
  UIBezierPath *path;
  UIColor *fillColor;
  UIColor *strokeColor;
}
@property (retain, nonatomic) UIBezierPath *path;
@property (retain, nonatomic) UIColor *fillColor;
@property (retain, nonatomic) UIColor *strokeColor;
- (id)initWithPath:(UIBezierPath *)p fillColor:(UIColor *)f strokeColor:(UIColor *)s;
+ (id)pathDrawingInfoWithPath:(UIBezierPath *)p fillColor:(UIColor *)f strokeColor:(UIColor *)s;
@end

//  PathDrawingInfo.m
#import "PathDrawingInfo.h"
@implementation PathDrawingInfo
@synthesize path, fillColor, strokeColor;
- (id)initWithPath:(UIBezierPath *)p fillColor:(UIColor *)f strokeColor:(UIColor *)s {
  if ((self = [self init])) {
    path = [p retain];
    fillColor = [f retain];
    strokeColor = [s retain];
  }
  return self;
}
+ (id)pathDrawingInfoWithPath:(UIBezierPath *)p fillColor:(UIColor *)f strokeColor:(UIColor *)s {
  return [[[self alloc] initWithPath:p fillColor:f strokeColor:s] autorelease];
}
- (void)dealloc {
  self.path = nil;
  self.fillColor = nil;
  self.strokeColor = nil;
  [super dealloc];
}
- (void)draw {
  CGContextRef context = UIGraphicsGetCurrentContext();
  CGContextSaveGState(context);
  if (self.fillColor) {
    [self.fillColor setFill];
    [self.path fill];
  }
  if (self.strokeColor) {
    [self.strokeColor setStroke];
    [self.path stroke];
  }
  CGContextRestoreGState(context);
}
@end
The PencilTool class, and all the rest of the Tool classes, also makes use of the SYNTHESIZE_SINGLETON_FOR_CLASS
macro. This chunk of code, which comes from Matt Gallagher's Cocoa with
Love blog, provides a standardized way to make any class into a
singleton. This is perfect for Dudel's tools, since we never need more
than one of each kind. This macro overrides all of the methods that deal
with memory management, making sure that only one instance of this
class is ever created. To use it, add a new header file called SynthesizeSingleton.h to your project, with the following content:
//
//  SynthesizeSingleton.h
//  CocoaWithLove
//
//  Created by Matt Gallagher on 20/10/08.
//

#define SYNTHESIZE_SINGLETON_FOR_CLASS(classname) \
 \
static classname *shared##classname = nil; \
 \
+ (classname *)shared##classname \
{ \
        @synchronized(self) \
        { \
                if (shared##classname == nil) \
                { \
                        shared##classname = [[self alloc] init]; \
                } \
        } \
         \
        return shared##classname; \
} \
 \
+ (id)allocWithZone:(NSZone *)zone \
{ \
         @synchronized(self) \
         { \
                 if (shared##classname == nil) \
                 { \
                         shared##classname = [super allocWithZone:zone]; \
                         return shared##classname; \
                 } \
         } \
          \
         return nil; \
} \
 \
- (id)copyWithZone:(NSZone *)zone \
{ \
        return self; \
} \
 \
- (id)retain \
{ \
        return self; \
} \
 \
- (NSUInteger)retainCount \
{ \
        return NSUIntegerMax; \
} \
 \
- (void)release \
{ \
} \
 \
- (id)autorelease \
{ \
        return self; \
}
NOTE
This sort of macro
definition is inherently sort of tricky to type in on your own, since
the backslash character on each line must come right at the end of the
line, without any trailing spaces. Your best bet is to copy this file
from the book's source code archive.
You're now very close to being
able to try things out! At this point, all that's left to enable the
Pencil tool is the addition of a few lines in DudelViewController.m. Start by importing the header:
#import "PencilTool.h"
Then populate the touchPencilItem: method as follows:
- (IBAction)touchPencilItem:(id)sender {
  self.currentTool = [PencilTool sharedPencilTool];
  [pencilButton setImage:[UIImage imageNamed:@"button_cdots_selected.png"]];
}
Finally, to arrange that this tool is selected by default when the app starts, add a line to the viewDidLoad method:
- (void)viewDidLoad {
  [super viewDidLoad];
  self.currentTool = [PencilTool sharedPencilTool];
  self.fillColor = [UIColor lightGrayColor];
  self.strokeColor = [UIColor blackColor];
  self.strokeWidth = 2.0;
}
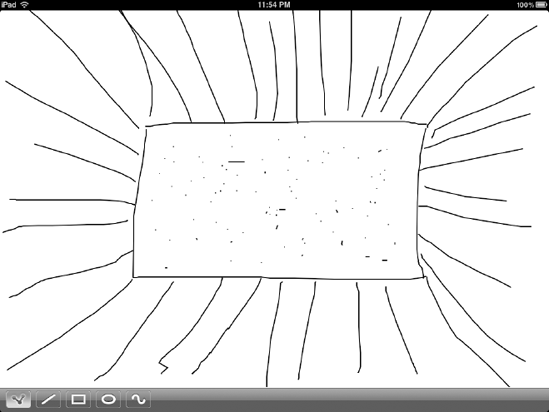
You should now be able to build
and run your app. Try tapping and dragging all over the screen with the
Pencil tool, making dots and squiggles. Figure 1 shows an example of a drawing made with our new tool.